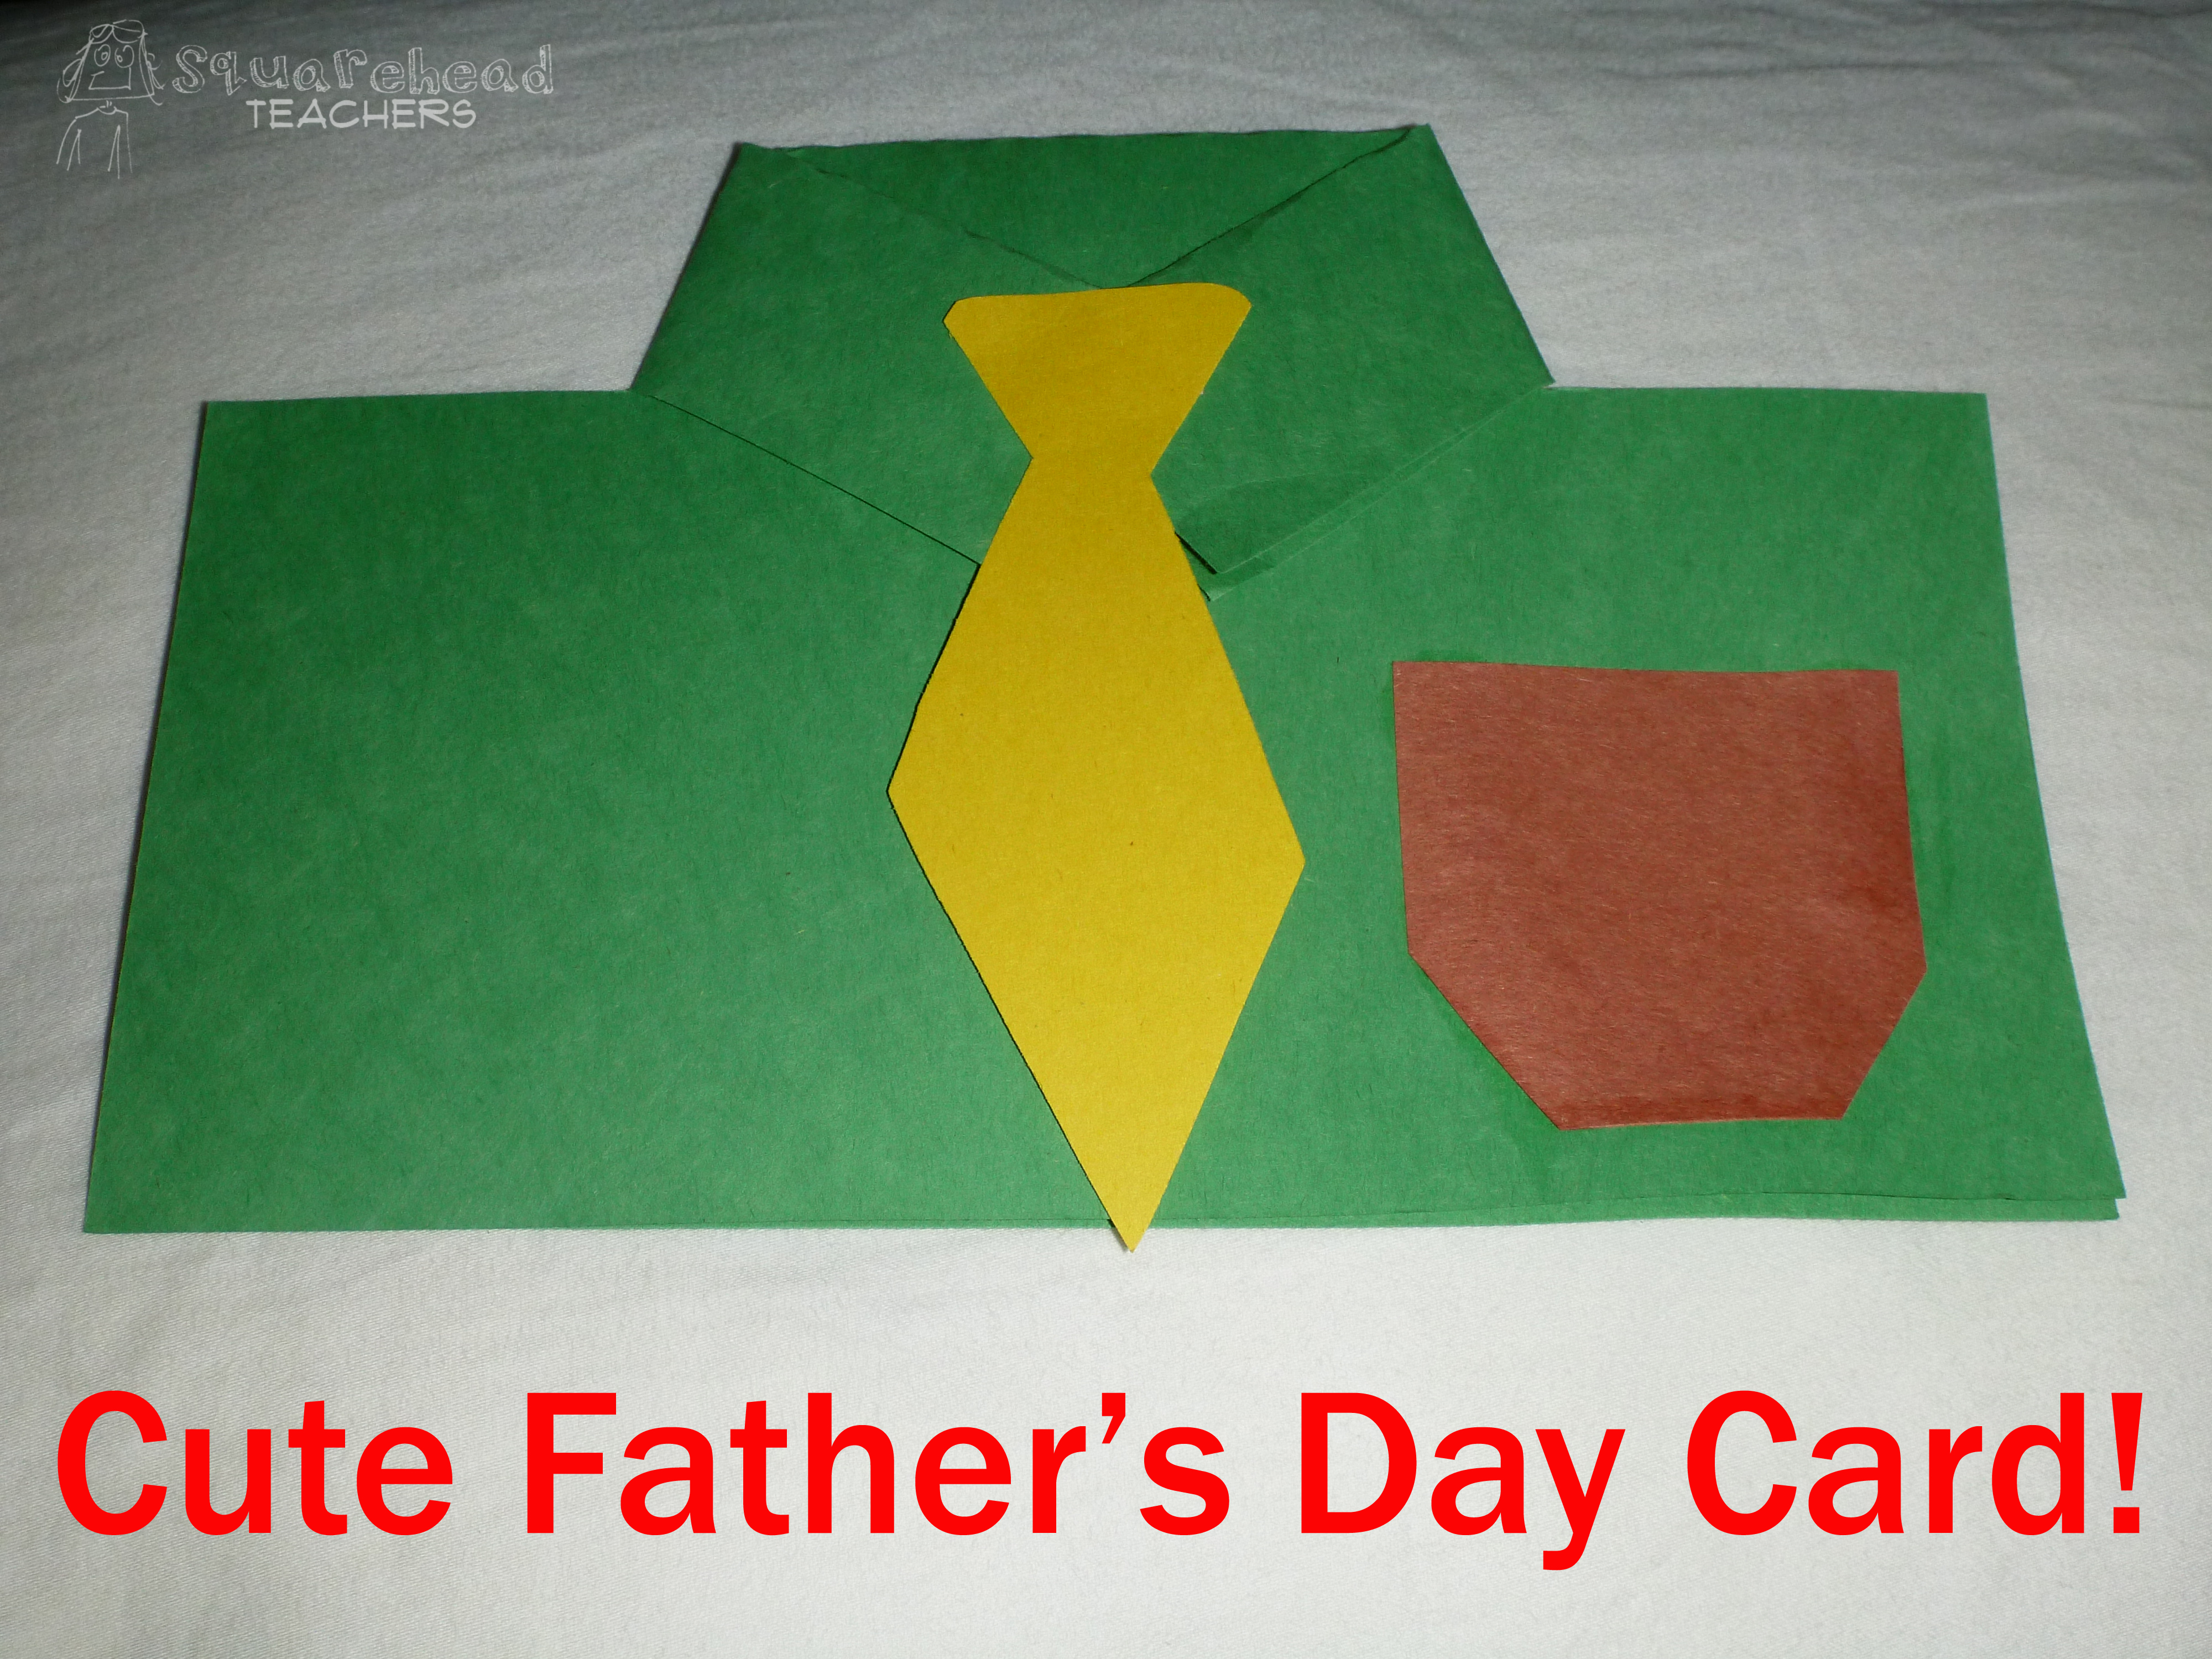
 This is hands down the cutest Father’s Day card… and it’s so easy, you’ll flip. In this tutorial, I used regular construction paper (9″ x 12″), but if you prefer more space to write inside the card, use the double size 11″ X 17″ paper. You need 1 piece for the shirt (green paper in the photos) and some small scraps for a tie and pocket (yellow and brown in the photos). You’ll also need scissors and glue (Elmer’s bottled glue or glue stick). I’ve seen really cute ones with decorated ties or ties cut out of fabric also. But whatever you do, make sure Dad knows you love him. That’s the point of Father’s Day after all. So without further ado, here’s the tutorial:
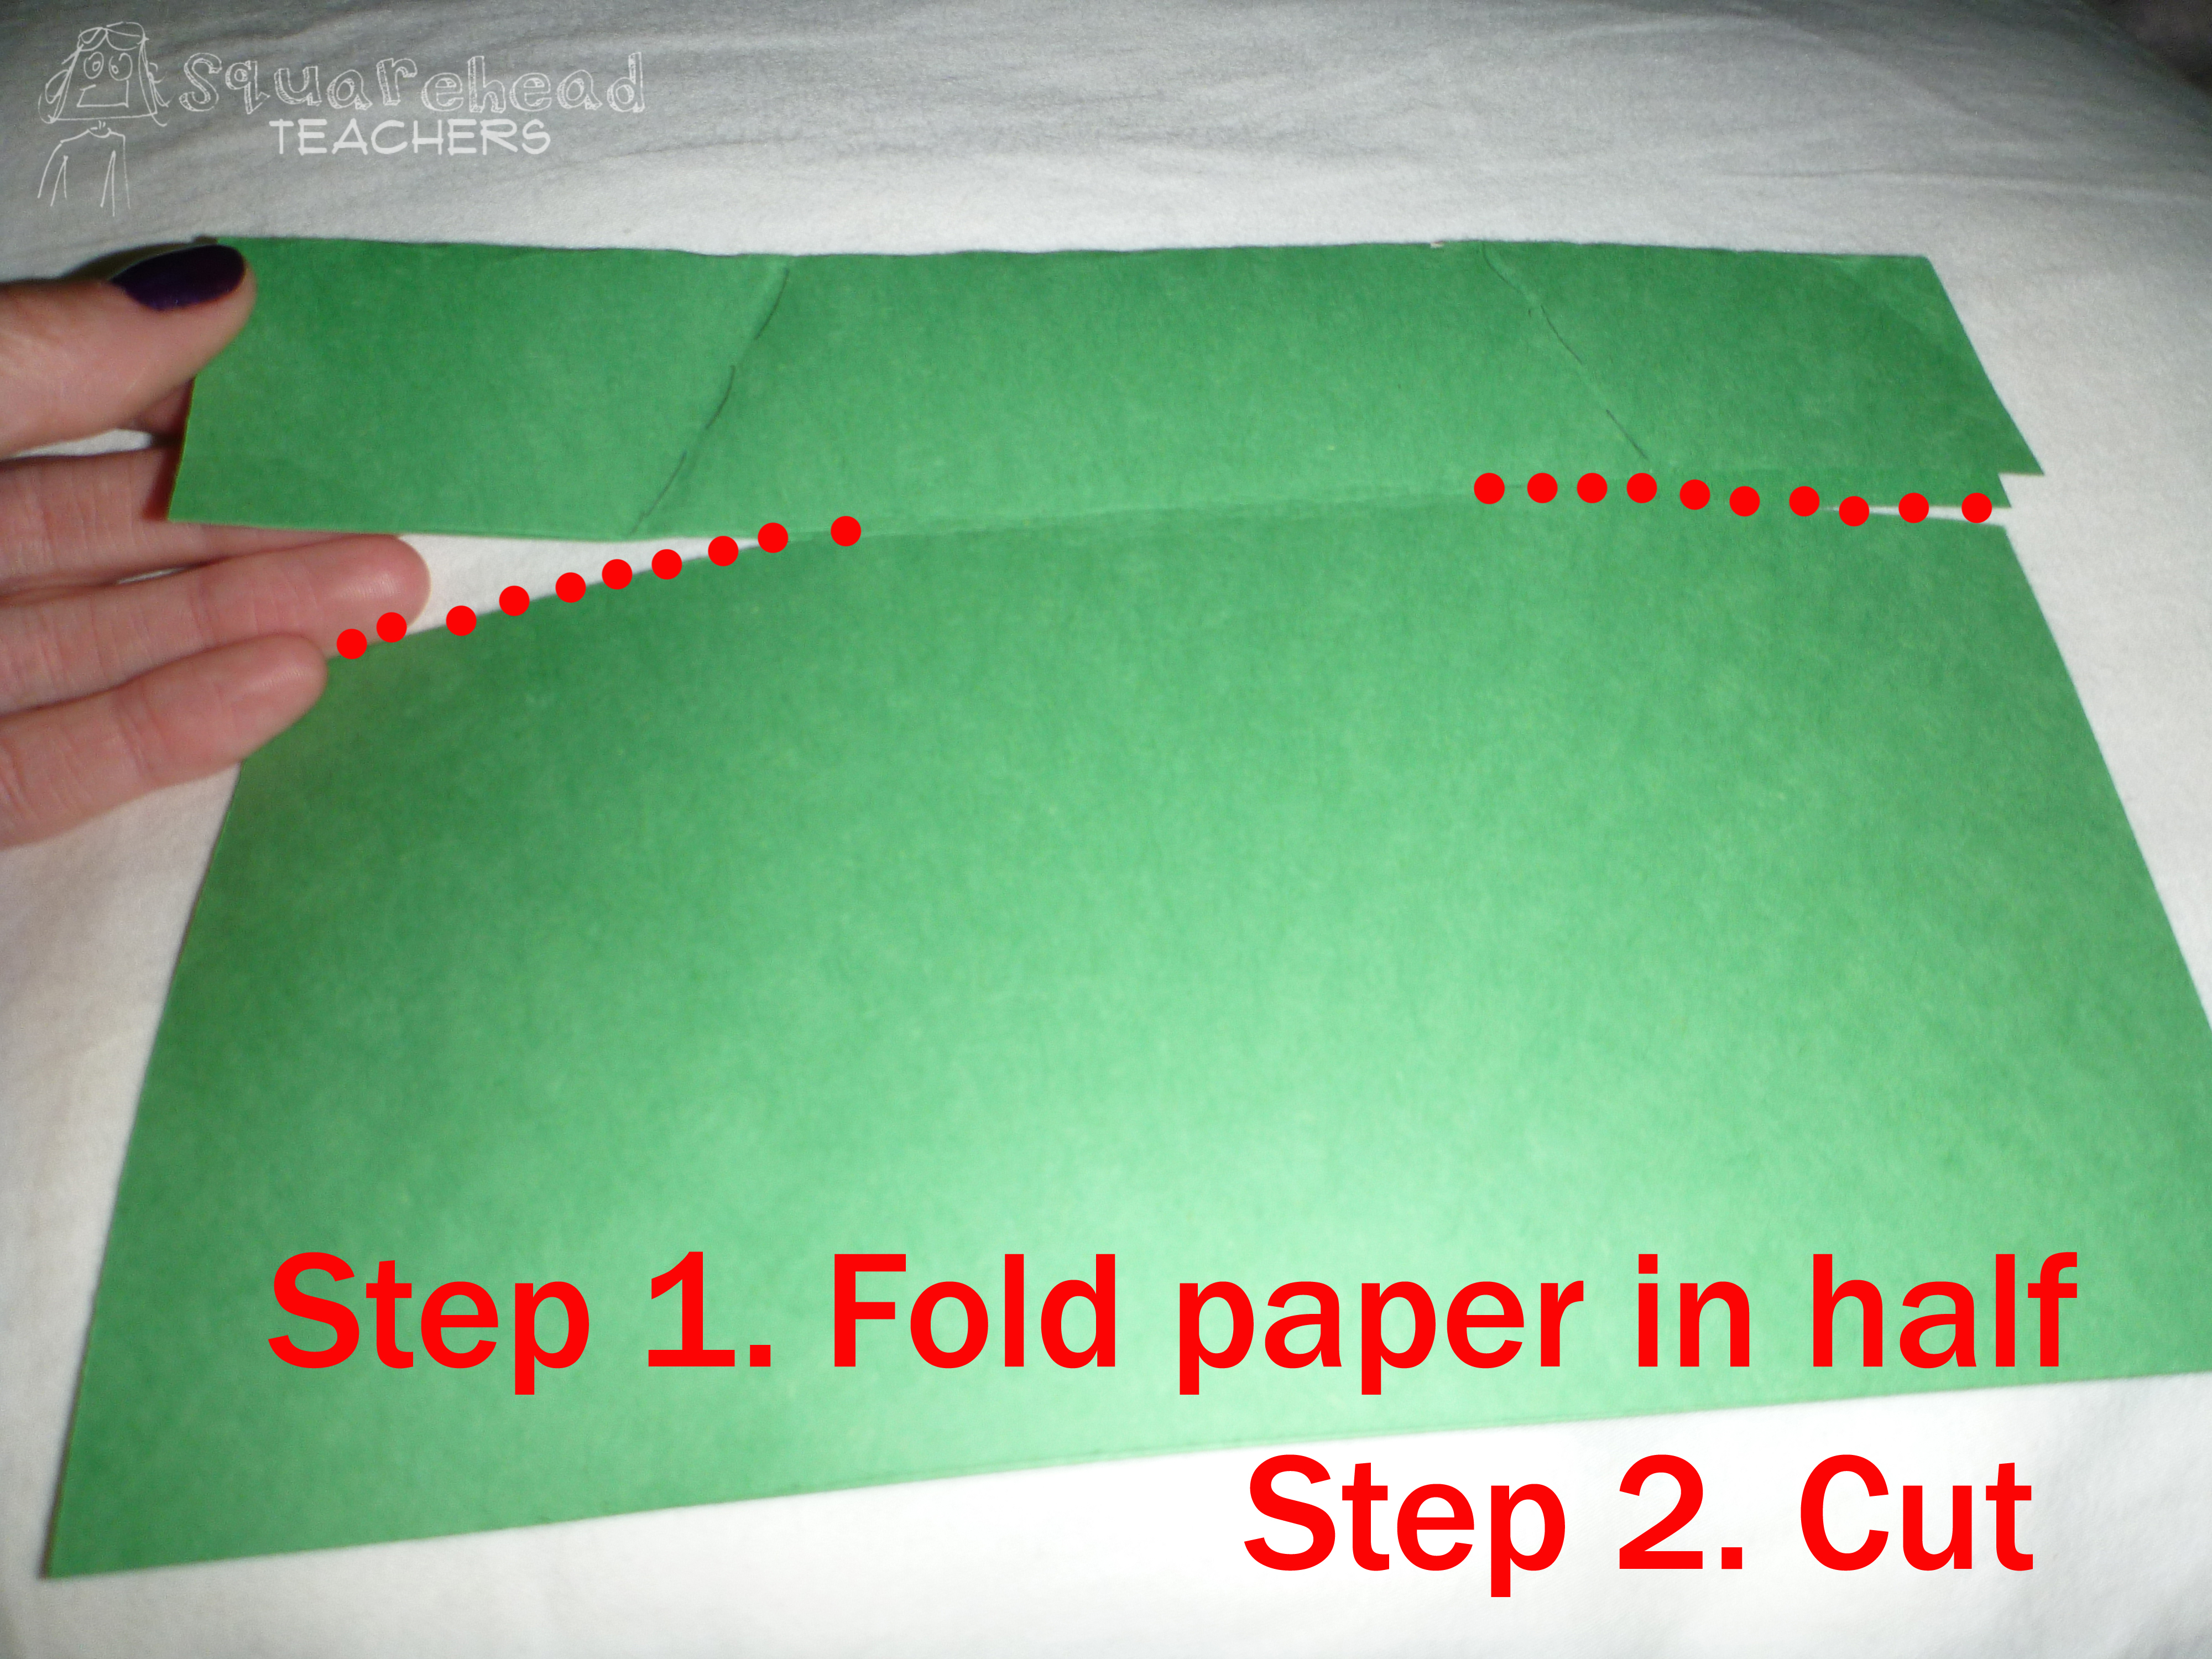
Fold your construction paper in half (“hamburger style” as kids always say). Then make 2 cuts in it about 1.5 or 2 inches below the fold. Don’t cut all the way across; leave the middle 1/3 of the width of the paper untouched.
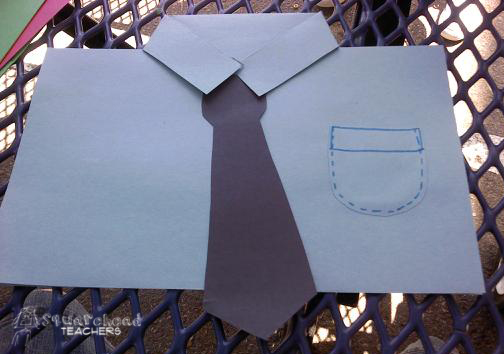
Fold the newly created tabs diagonally towards the bottom (open edged of paper). They should meet or overlap a little bit. If it looks like a mens’ shirt collar, you’re on the right track. Then decorate it! Add a tie, pocket, buttons, pens, pen protector… whatever describes your card recipient.
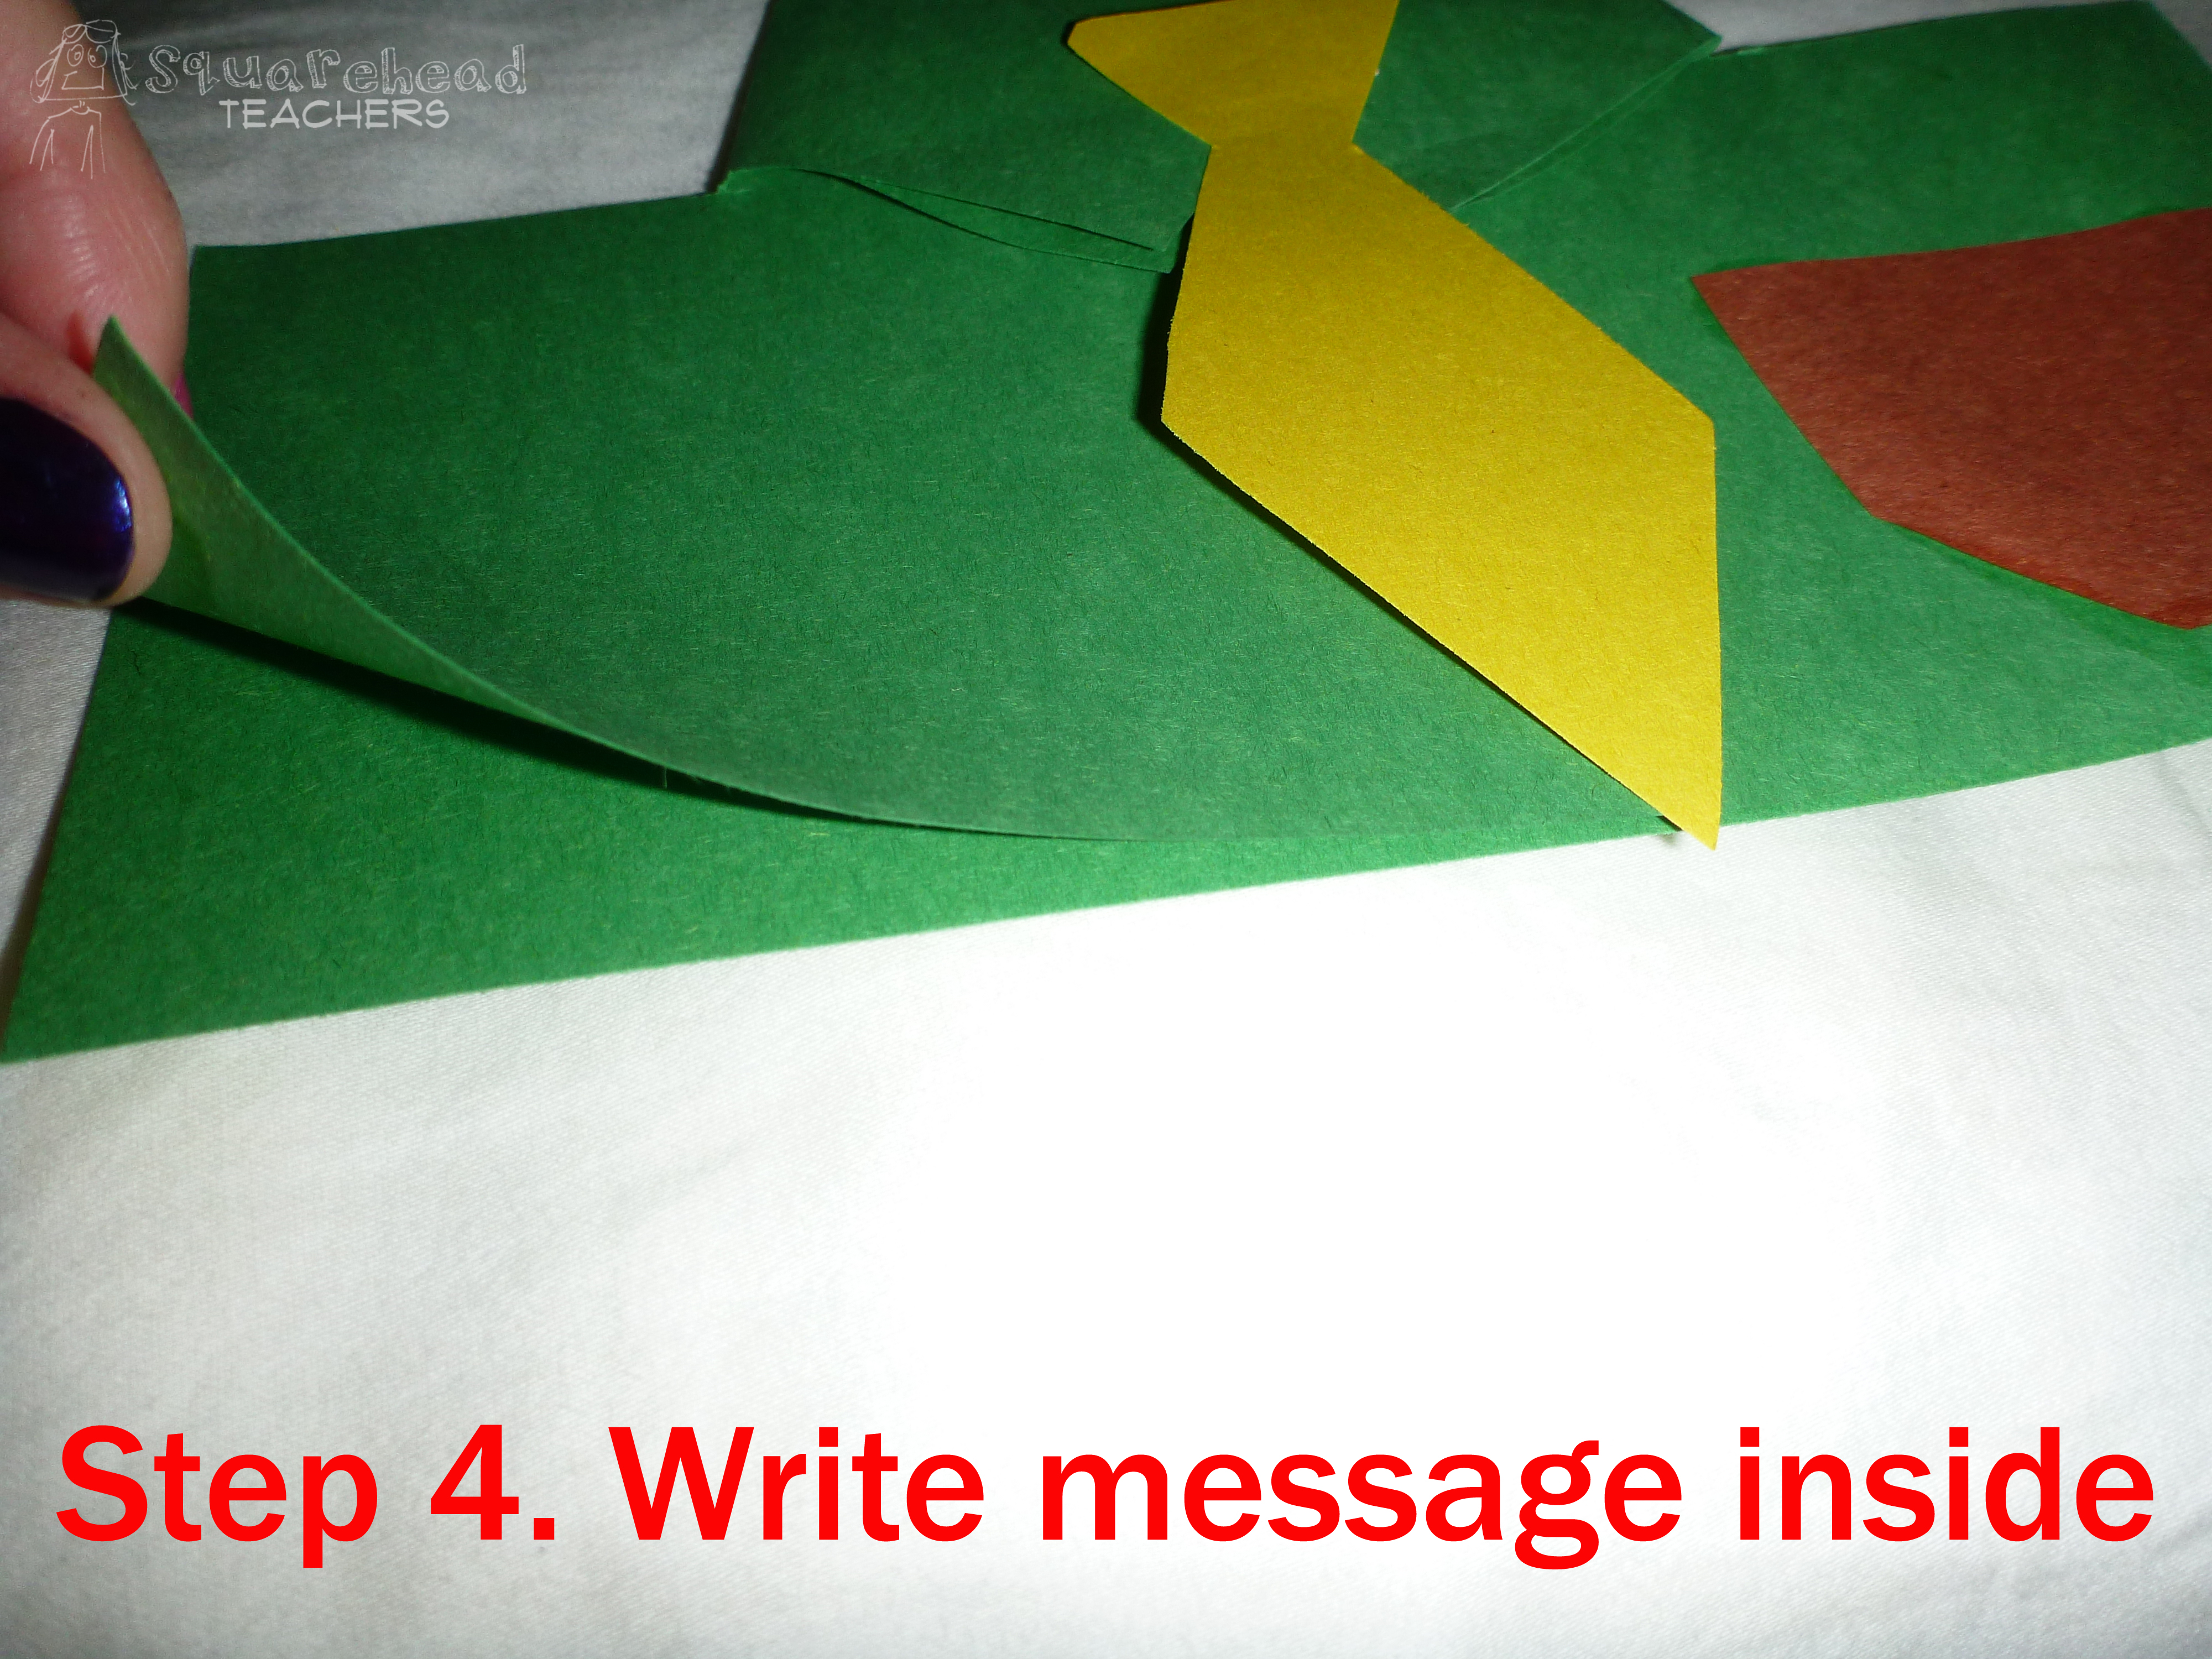
After the glue dries, gently open the card from the bottom and write your message. Be gentle with the collar area, since it’s the most fragile part of the card.
Here are some ideas for a more educational twist on this craft:
- Write a poem about Dad and glue it inside the card
- Write about your favorite memory about you and Dad
- Write 10 reasons you love Dad
- Rewrite the lyrics to a famous song. Sing about how cool Dad is.
- Write the ABCs of Dad (A… always kisses me goodnight, B… best baseball coach ever, etc.)

 It’s always helpful to get to know your students at the beginning of the year. Here’s one bulletin board idea that will help each student express themselves and be a part of the classroom. First, have the students make their bus (using the directions in this post and printed on the page below the bus).

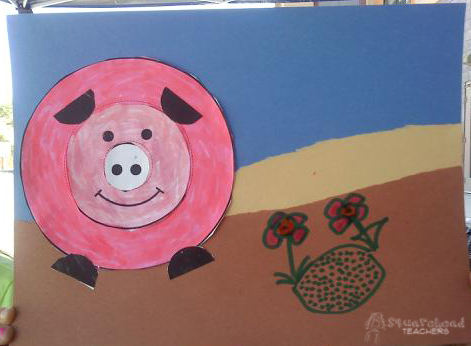
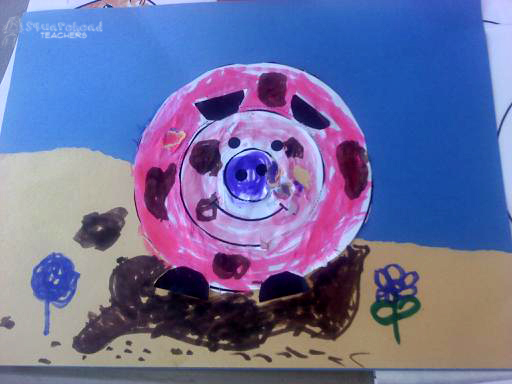
 Here’s a fun, easy craft project that’s simple enough that my kindergarten kids figured it out with hardly any help. Each kid decorated their pig however they wanted. Then they told each other a story about how the pig came to look the way it looked. The stories got pretty wild (which is the fun part). You could even go on to focus on adjectives that describe the pig, nouns the pig likes, write a story about the pig, etc. Have fun!